How to Install SAP B1 version 10 on SAP HANA 2.0

Installing SAP B1 and SAP HANA on SUSE 15
This is fifth and final article in the series that will end with a proper install of SAP B1 10 on SAP HANA 2.0.
- First article was on how to setup a new dedicated Hetzner Server as a base.
- The second article was on how to install Proxmox on Hetzner server.
- Third article was on how to install SUSE 15 SP1.
- Fourth Article was about how to install Windows Server 2016.
In this article we will describe how to install both SAP B1 version 10 and SAP HANA version 2.0.
The first thing that we need to do it to get the latest release of SAP B1 version 10 and SAP HANA 2.0 from the SAP website. You can download it and store these either in /hana/data directory or the /usr/sap directory as both these directories have lot of space and we will delete the install files from these location after SAP is installed properly.
Useful links
You can also follow the videos listed below which give step by step instructions on how to install SAP B1 and SAP HANA. Our article does not use Xming and SAMBA as mentioned in the videos. Instead for accessing the SUSE GUI we use Console in Proxmox or RDP, for transferring the files we use winscp and for most of the installation we use ssh. You can use whichever method suits you.
Install SAP HANA 2.0
Install SAP B1 10 on SAP HANA 2.0
Install Process for SAP HANA 2.0
- First login to the SUSE server using
rootuser and its credentials

- Before doing anything else, run
Package Updaterto ensure you have the latest OS updates.

Enable ssh on server if its disabled
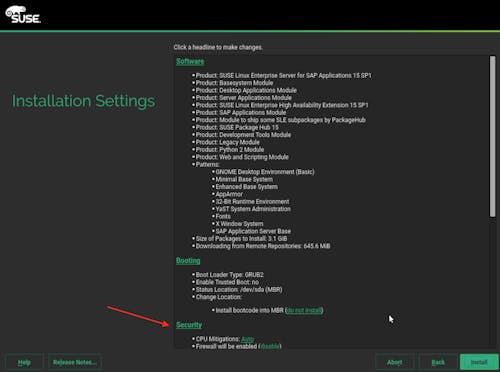
- You can perform most of the installation using Proxmox Console to enter the command in SUSE, which though functional, does not allow us to copy & paste the code into it. Also the best way to manage any Linux server is via
SSH. With SUSE you can enablesshas part of the install process so that it will installOpenSSHand whitelistsshport in the firewall to allow incomingsshconnections. In case you forgot to do it during the install process, then enter the following commands in theterminalwindow in SUSE.
#Refresh zypper's package list
> zypper refresh

#Install openssh package if not already installed
> zypper install --no-confirm openssh

#Start sshd service via systemd
> systemctl start sshd

#Check if sshd is successfully started
> systemctl status sshd

#Enable sshd during system startup
> systemctl enable sshd

#Enable firewall rule for ssh
> firewall-cmd --permanent --add-service=ssh

#Reload firewall rules
> firewall-cmd --reload
(Optional) Enable RDP for Linux
If you find that Proxmox console is difficult to use, then you can use RDP to connect to SUSE SAP Server. Run the following commands on the SUSE server
# Refresh zypper
> zypper ref

# Install XRDP
> zypper in xrdp

# Enable the XRDP service, so that it gets automatically started at boot time:
> systemctl enable xrdp

# Start the XRDP service
> systemctl start xrdp
Install VNC
RDP on Linux uses VNC behind the scenes, therefore, before using XRDP we need to install VNC using the YaST Control Center.
- Open the
YaST Control Centerby opening theActivitiesmenu, on the top-left screen corner, typingyastand clicking the corresponding icon:

- Then click the Remote Administration (VNC) item in the Network Services category
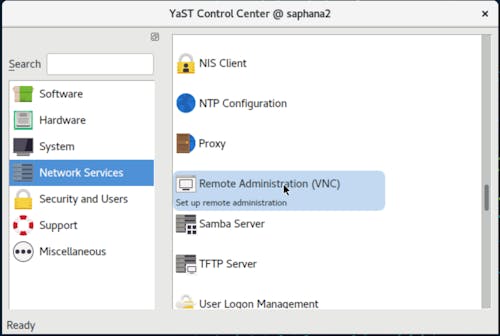
- Check the
Allow Remote Administration with Session Managementoption and also make sure to check theOpen Port in Firewalland then follow any prompts to allowYaSTto install any additional software that is required. You will have to log off and then log in for the settings to take effect.

Your firewall should be setup as part of the above steps but in case it still does not allow connections you can run the following commands:
# Open the fireall port
> firewall-cmd --permanent --zone=public --add-service=ms-wbt
success
# Reload the firewalld rules
> firewall-cmd --reload
success
To use xrdp make sure to log out of the SUSE server
After this you can use your RDP client to connect to the SUSE SAP HANA Server
Download SAP and expand the software
In this guide, we will be using /hana/data/software directory to store the SAP HANA and SAP B1 software. If you use some different directory structure, then change the instructions below accordingly.
Install Prerequisite Software for SAP HANA & SAP B1
Your installation might complain of missing packages. Some of the required software/libraries are:
python-pycryptopython2-pyOpenSSLrpm-buildnfs-kernel-serverglibc-i18ndata
Use the commands below to install the required software/libraries
> cd /hana/data
> mkdir software
> cd software

> zypper install python-pycrypto rpm-build nfs-kernel-server python2-pyOpenSSL glibc-i18ndata
SAP Software List
Make sure to download the latest versions of the software:
| Software | Info | Version we are using | Filename* |
|---|---|---|---|
| SAPCAR | Utility used to uncompress SAP Archives | SAPCAR.exe | |
| B1 HANA 2.0 | HANA 2.0 Enterprise for B1 | B1 HANA 2.0 SPS05 | 51054611.ZIP |
| SAP B1 10 | SAP B1 10 for HANA | SAP 10.0 PL02 | 51054453.ZIP |
Software Location
For this article, it is assumed that the files are stored in the /hana/data/software directory as follows:
> cd /hana/data/software
> ls

SAPCAR.zip
B1 HANA 2.0 SPS05/
SAP 10.0 PL02/
Setup SAPCAR
SAPCAR utility is used in installing SAP software.
- First unzip
SAPCAR.ZIPfile using normalunzipcommand
> cd /hana/data/software

> unzip SAPCAR.zip
- We need the
SAPCAR.EXEfile that has been expanded in theLinuxdirectory. We make this file executable and move it to/sbindirectory so that we can call it from any directory
> cd SAPCAR/Linux

# make the file executable
> chmod a+x SAPCAR.EXE

# copy to sbin so that you can call SAPCAR from any where
> cp SAPCAR.EXE /sbin

> cd ../..

# test if SAPCAR is working
> SAPCAR.EXE
usage:

create a new archive:
SAPCAR -c[vir][f archive] [-P] [-C directory]
   [-A filename] [-T filename] [-X filename]
   [-p value] [-V] file1 file2 ...

list the contents of an archive:
SAPCAR -t[vs][f archive] [file1 file2....]

extract files from an archive:
SAPCAR -x[v][f archive] [-R directory] [-A filename]
   [-V] [file1 file2....]
   .
   .
   .
   .
Extract SAP HANA 2 and SAP B1
- Unzip the SAP Hana 2.0 Archive file
> cd /hana/data/software/B1\ HANA\ 2.0\ SPS05

> unzip 51054611.ZIP
Prepare SAP HANA Database Lifecycle Manager
- For ease of use, we move the required files to the
softwaredirectory
> cd  /hana/data/software
> mv B1\ HANA\ 2.0\ SPS05/DATA_UNITS/SAP\ HANA\ DATABASE\ 2.0\ FOR\ B1/LINX64SUSE/IMDB_SERVER20_050_0.SAR ./

> mv B1\ HANA\ 2.0\ SPS05/DATA_UNITS/SAP\ HANA\ CLIENT\ 2.0\ FOR\ B1/LINX64SUSE/IMDB_CLIENT20_005_86.SAR ./

> mv B1\ HANA\ 2.0\ SPS05/DATA_UNITS/SAP\ HANA\ AFL\ 2.0\ FOR\ B1/LINX64SUSE/IMDB_AFL20_050_0.SAR ./

> l

total 4165620
drwxr-xr-x 5 root root        175 Dec 12 13:43 ./
drwxr-xr-x 4 root root        165 Dec 12 13:02 ../
drwxr-xr-x 3 root root        230 Dec 12 13:34 B1 HANA 2.0 SPS05/
-r-xr-xr-x 1 root root  154635595 Jun 25 19:18 IMDB_AFL20_050_0.SAR*
-r-xr-xr-x 1 root root  406835358 Jun 25 19:55 IMDB_CLIENT20_005_86.SAR*
-r-xr-xr-x 1 root root 3699600948 Jun 25 18:59 IMDB_SERVER20_050_0.SAR*
drwxr-xr-x 2 root root         46 Nov 24 10:43 SAP 10.0 PL02/
drwxr-xr-x 4 root root         34 Nov 24 16:09 SAPCAR/
-rw-r--r-- 1 root root    4515473 Dec 12 12:07 SAPCAR.zip
- Now we use
SAPCARto expand these archives
Extract SERVER
Note carefully, that this extraction command has manifest.. at the end, while other ones do not need this
> cd /hana/data/software

> SAPCAR.EXE -vxf IMDB_SERVER20_050_0.SAR -manifest SIGNATURE.SMF

SAPCAR: processing archive IMDB_SERVER20_050_0.SAR (version 2.01)
x SAP_HANA_DATABASE
x SAP_HANA_DATABASE/server
.
.
.
x SIGNATURE.SMF
SAPCAR: 351 file(s) extracted
Extract AFL
> cd /hana/data/software

> SAPCAR.EXE -vxf IMDB_AFL20_050_0.SAR
SAPCAR: processing archive IMDB_AFL20_050_0.SAR (version 2.01)
x SAP_HANA_AFL
x SAP_HANA_AFL/instruntime
x SAP_HANA_AFL/instruntime/libSQLDBCHDB.so
.
.
.
x SIGNATURE.SMF
SAPCAR: 55 file(s) extracted
Extract CLIENT
> cd /hana/data/software

> SAPCAR.EXE -vxf IMDB_CLIENT20_005_86.SAR

SAPCAR: processing archive IMDB_CLIENT20_005_86.SAR (version 2.01)
x SAP_HANA_CLIENT
x SAP_HANA_CLIENT/LABEL.ASC
.
.
.
x SAP_HANA_CLIENT/client/DBCAPI.TGZ.lst
x SAP_HANA_CLIENT/client/CALCVIEWAPI.TGZ
x SIGNATURE.SMF
SAPCAR: 102 file(s) extracted
Installing SAP HANA Components
> cd /hana/data/software/SAP_HANA_DATABASE

> ./hdblcm


SAP HANA Lifecycle Management - SAP HANA Database 2.00.050.00.1592305219
************************************************************************


Scanning software locations...
Detected components:
    SAP HANA AFL (incl.PAL,BFL,OFL) (2.00.050.0000.1592327743) in /hana/data/software/SAP_HANA_AFL/packages
    SAP HANA Database (2.00.050.00.1592305219) in /hana/data/software/SAP_HANA_DATABASE/server
    SAP HANA Database Client (2.5.86.1591211272) in /hana/data/software/SAP_HANA_CLIENT/client


Do you want to specify additional components location? (y/n) [n]:

Choose an action

  Index | Action             | Description
  -----------------------------------------------
  1     | install            | Install new system
  2     | extract_components | Extract components
  3     | Exit (do nothing)  |

Enter selected action index [3]: 1


SAP HANA Database version '2.00.050.00.1592305219' will be installed.

Select additional components for installation:

  Index | Components | Description
  ---------------------------------------------------------------------------------------------
  1     | all        | All components
  2     | server     | No additional components
  3     | client     | Install SAP HANA Database Client version 2.5.86.1591211272
  4     | afl        | Install SAP HANA AFL (incl.PAL,BFL,OFL) version 2.00.050.0000.1592327743

Enter comma-separated list of the selected indices [3]: 1
Enter Installation Path [/hana/shared]:
Enter Local Host Name [saphana2]: saphana2.example.com
Do you want to add hosts to the system? (y/n) [n]:
Enter SAP HANA System ID: HDB
Enter Instance Number [00]:
Enter Local Host Worker Group [default]:

  Index | System Usage | Description
  -------------------------------------------------------------------------------
  1     | production   | System is used in a production environment
  2     | test         | System is used for testing, not production
  3     | development  | System is used for development, not production
  4     | custom       | System usage is neither production, test nor development

Select System Usage / Enter Index [4]: 3
Do you want to enable data and log volume encryption? [n]:
Enter Location of Data Volumes [/hana/data/HDB]:
Enter Location of Log Volumes [/hana/log/HDB]:
Restrict maximum memory allocation? [n]:
Enter Certificate Host Name For Host 'saphana2.example.com' [saphana2.example.com]:
Enter SAP Host Agent User (sapadm) Password:
Confirm SAP Host Agent User (sapadm) Password:
Enter System Administrator (hdbadm) Password:
Confirm System Administrator (hdbadm) Password:
Enter System Administrator Home Directory [/usr/sap/HDB/home]:
Enter System Administrator Login Shell [/bin/sh]:
Enter System Administrator User ID [1001]:
Enter ID of User Group (sapsys) [79]:
Enter System Database User (SYSTEM) Password:
Confirm System Database User (SYSTEM) Password:
Restart system after machine reboot? [n]: y

Summary before execution:
=========================

SAP HANA Database System Installation
   Installation Parameters
      Remote Execution: ssh
      Database Isolation: low
      Install Execution Mode: optimized
      Installation Path: /hana/shared
      Local Host Name: saphana2.example.com
      SAP HANA System ID: HDB
      Instance Number: 00
      Local Host Worker Group: default
      System Usage: development
      Location of Data Volumes: /hana/data/HDB
      Location of Log Volumes: /hana/log/HDB
      SAP HANA Database secure store: ssfs
      Certificate Host Names: saphana2.example.com
      System Administrator Home Directory: /usr/sap/HDB/home
      System Administrator Login Shell: /bin/sh
      System Administrator User ID: 1001
      ID of User Group (sapsys): 79
      Restart system after machine reboot?: Yes
      SAP HANA Database Client Installation Path: /hana/shared/HDB/hdbclient
   Software Components
      SAP HANA Database
         Install version 2.00.050.00.1592305219
         Location: /hana/data/software/SAP_HANA_DATABASE/server
      SAP HANA AFL (incl.PAL,BFL,OFL)
         Install version 2.00.050.0000.1592327743
         Location: /hana/data/software/SAP_HANA_AFL/packages
      SAP HANA Database Client
         Install version 2.5.86.1591211272
         Location: /hana/data/software/SAP_HANA_CLIENT/client
   Log File Locations
      Log directory: /var/tmp/hdb_HDB_hdblcm_install_2020-12-12_14.30.58
      Trace location: /var/tmp/hdblcm_2020-12-12_14.30.58_17736.trc
- If everything goes well the install will start and it will take anywhere between 5 to 15 minutes to finish.
Confirm if the install is done properly
> cd /hana/data/software/SAP_HANA_DATABASE

> su - hdbadm

hdbadm@saphana2:/usr/sap/HDB/HDB00> sapcontrol -nr 00 -function GetProcessList

12.12.2020 14:51:48
GetProcessList
OK
name, description, dispstatus, textstatus, starttime, elapsedtime, pid
hdbdaemon, HDB Daemon, GREEN, Running, 2020 12 12 14:45:32, 0:06:16, 18911
hdbcompileserver, HDB Compileserver, GREEN, Running, 2020 12 12 14:45:59, 0:05:49, 19131
hdbnameserver, HDB Nameserver, GREEN, Running, 2020 12 12 14:45:32, 0:06:16, 18929
hdbpreprocessor, HDB Preprocessor, GREEN, Running, 2020 12 12 14:45:59, 0:05:49, 19134
hdbwebdispatcher, HDB Web Dispatcher, GREEN, Running, 2020 12 12 14:47:42, 0:04:06, 19708
hdbindexserver, HDB Indexserver-HDB, GREEN, Running, 2020 12 12 14:45:59, 0:05:49, 19181
hdbxsengine, HDB XSEngine-HDB, GREEN, Running, 2020 12 12 14:45:59, 0:05:49, 19184
hdbadm@saphana2:/usr/sap/HDB/HDB00>
- This shows that the services are up and running and now we check the connection to database
hdbadm@saphana2:/usr/sap/HDB/HDB00> hdbsql -u SYSTEM -n localhost:30015 -d HDB
Password:

Welcome to the SAP HANA Database interactive terminal.

Type:  \h for help with commands
       \q to quit

#Show all Tenant Databases
hdbsql HDB=> select * from SYS.M_DATABASES
1 row selected (overall time 4647.453 msec; server time 449 usec)

#Result
DATABASE_NAME,DESCRIPTION,ACTIVE_STATUS,ACTIVE_STATUS_DETAILS,OS_USER,OS_GROUP,RESTART_MODE,FALLBACK_SNAPSHOT_CREATE_TIME
"HDB","HDB-00","YES","","","","DEFAULT",?

#Show all tenant database schemas
hdbsql HDB=> select * from SCHEMAS
32 rows selected (overall time 140.278993 sec; server time 12.662 msec)

#Result
SCHEMA_NAME,SCHEMA_OWNER,HAS_PRIVILEGES,CREATE_TIME
"HANA_XS_BASE","_SYS_REPO","TRUE","2020-12-12 14:49:27.752000000"
"SAP_REST_API","_SYS_REPO","TRUE","2020-12-12 14:49:27.760000000"
"SAP_XS_LM","_SYS_REPO","TRUE","2020-12-12 14:49:27.745000000"
"SAP_XS_LM_PE","_SYS_REPO","TRUE","2020-12-12 14:49:27.729000000"
"SAP_XS_USAGE","_SYS_REPO","TRUE","2020-12-12 14:49:27.737000000"
"SYS","SYS","TRUE","2020-12-12 14:46:03.936000000"
"SYSTEM","SYSTEM","TRUE","2020-12-12 14:46:03.980000000"
"UIS","_SYS_REPO","TRUE","2020-12-12 14:49:27.768000000"
"_SYS_AFL","_SYS_AFL","TRUE","2020-12-12 14:46:38.403000000"
"_SYS_BI","_SYS_REPO","TRUE","2020-12-12 14:46:31.561000000"
"_SYS_BIC","_SYS_REPO","TRUE","2020-12-12 14:46:31.566000000"
"_SYS_DATA_ANONYMIZATION","_SYS_DATA_ANONYMIZATION","TRUE","2020-12-12 14:47:37.579000000"
"_SYS_LDB","SYS","TRUE","2020-12-12 14:46:35.478000000"
"_SYS_PLAN_STABILITY","_SYS_PLAN_STABILITY","TRUE","2020-12-12 14:47:37.705000000"
"_SYS_REPO","_SYS_REPO","TRUE","2020-12-12 14:46:29.283000000"
"_SYS_RT","_SYS_REPO","TRUE","2020-12-12 14:46:30.355000000"
"_SYS_SECURITY","SYSTEM","TRUE","2020-12-12 14:46:35.315000000"
"_SYS_SQL_ANALYZER","_SYS_SQL_ANALYZER","TRUE","2020-12-12 14:46:35.733000000"
"_SYS_STATISTICS","_SYS_STATISTICS","TRUE","2020-12-12 14:46:06.937000000"
"_SYS_TABLE_REPLICAS","_SYS_TABLE_REPLICAS","TRUE","2020-12-12 14:46:28.911000000"
"_SYS_TASK","_SYS_TASK","TRUE","2020-12-12 14:46:36.076000000"
"_SYS_TELEMETRY","_SYS_STATISTICS","TRUE","2020-12-12 14:46:06.937000000"
"_SYS_XS","_SYS_REPO","TRUE","2020-12-12 14:46:30.132000000"
"SAP_XS_LM_PE_TMP","_SYS_REPO","FALSE","2020-12-12 14:49:27.722000000"
"_SYS_AUDIT","SYS","FALSE","2020-12-12 14:46:35.499000000"
"SAPDBCTRL","SAPDBCTRL","FALSE","2020-12-12 14:49:21.549000000"
"XSSQLCC_AUTO_USER_D5D3B0C4F06A79377BE0D4198763EC5EDEBC14E80D1BB1BBABA9D3B5F3C4AD1A","XSSQLCC_AUTO_USER_D5D3B0C4F06A79377BE0D4198763EC5EDEBC14E80D1BB1BBABA9D3B5F3C4AD1A","FALSE","2020-12-12 14:49:46.044000000"
"_SYS_EPM_DATA","_SYS_EPM","FALSE","2020-12-12 14:46:29.115000000"
"XSSQLCC_AUTO_USER_5E2492DBCDEDAE8BF85A0EA2741D2302882088A51A3ED5634ABEB402AE579A39","XSSQLCC_AUTO_USER_5E2492DBCDEDAE8BF85A0EA2741D2302882088A51A3ED5634ABEB402AE579A39","FALSE","2020-12-12 14:49:46.076000000"
"_SYS_WORKLOAD_REPLAY","_SYS_WORKLOAD_REPLAY","FALSE","2020-12-12 14:47:37.467000000"
"XSSQLCC_AUTO_USER_3094F258A8978F7A7558E080D94C8500B0772804AA2663AF6058A40D719CA72D","XSSQLCC_AUTO_USER_3094F258A8978F7A7558E080D94C8500B0772804AA2663AF6058A40D719CA72D","FALSE","2020-12-12 14:49:45.992000000"
"_SYS_EPM","_SYS_EPM","FALSE","2020-12-12 14:46:29.104000000"

#Close the connection
hdbsql HDB=> exit
- Now we need to connect to the
SYSTEMdatabase to create some additional services for installing SAP B1
hdbadm@saphana2:/usr/sap/HDB/HDB00> hdbsql -u SYSTEM -n localhost:30013
Password:

Welcome to the SAP HANA Database interactive terminal.

Type:  \h for help with commands
       \q to quit

hdbsql SYSTEMDB=> alter database HDB add 'scriptserver'
0 rows affected (overall time 5126.539 msec; server time 5124.182 msec)

hdbsql SYSTEMDB=> exit
hdbadm@saphana2:/usr/sap/HDB/HDB00>
- Confirm that the new service is running
hdbadm@saphana2:/usr/sap/HDB/HDB00> hdbsql -u SYSTEM -n localhost:30015 -d HDB
Password:

Welcome to the SAP HANA Database interactive terminal.

Type:  \h for help with commands
       \q to quit

#Check services
hdbsql HDB=> select * from SYS.M_SERVICES
8 rows selected (overall time 7842.725 msec; server time 689 usec)

#Result
HOST,PORT,SERVICE_NAME,PROCESS_ID,DETAIL,ACTIVE_STATUS,SQL_PORT,COORDINATOR_TYPE,IS_DATABASE_LOCAL
"saphana2.indivar.in",30000,"daemon",18911,"","YES",0,"NONE","FALSE"
"saphana2.indivar.in",30001,"nameserver",18929,"master","YES",0,"MASTER","FALSE"
"saphana2.indivar.in",30002,"preprocessor",19134,"","YES",0,"NONE","FALSE"
"saphana2.indivar.in",30006,"webdispatcher",19708,"","YES",0,"NONE","FALSE"
"saphana2.indivar.in",30010,"compileserver",19131,"","YES",0,"NONE","FALSE"
"saphana2.indivar.in",30003,"indexserver",19181,"master","YES",30015,"MASTER","TRUE"
"saphana2.indivar.in",30004,"scriptserver",23587,"master","YES",30034,"MASTER","TRUE"
"saphana2.indivar.in",30007,"xsengine",19184,"","YES",0,"NONE","TRUE"

#Exit
hdbsql HDB=> exit
Installing SAP HANA Client for Windows
We are assuming that you already have a Windows Server setup or you can use this link to set it up.
- We first need to extract the
SAP HANA CLIENT 2.0 for B1, which is located in theB1 HANA 2.0 SPS05/DATA_UNITS/SAP HANA CLIENT 2.0 FOR B1directory in our case. In this directory you will find clients for SUSE (Not needed in our case), 32 bit Windows and 64 bit Windows. We need both 32 and 64 bit clients, so we extract both of these. 32 bit client files are needed for things likeCrystal Reports, etc.
#### First we extract 32 bit version
> cd /hana/data/software/B1 HANA 2.0 SPS05/DATA_UNITS/SAP HANA CLIENT 2.0 FOR B1/NT_I386

> SAPCAR.EXE -vxf IMDB_CLIENT20_005_86.SAR

SAPCAR: processing archive IMDB_CLIENT20_005_86.SAR (version 2.01)
x SAP_HANA_CLIENT
x SAP_HANA_CLIENT/client
x SAP_HANA_CLIENT/client/ADONET.DEBUG.TGZ
.
.
.
.
x SAP_HANA_CLIENT/licenses/poco.txt
x SAP_HANA_CLIENT/vcruntime140.dll
x SIGNATURE.SMF
SAPCAR: 102 file(s) extracted

#### Now we extract 64 bit version

> cd /hana/data/software/B1 HANA 2.0 SPS05/DATA_UNITS/SAP HANA CLIENT 2.0 FOR B1/NT_X64

> SAPCAR.EXE -vxf IMDB_CLIENT20_005_86.SAR

SAPCAR: processing archive IMDB_CLIENT20_005_86.SAR (version 2.01)
x SAP_HANA_CLIENT
x SAP_HANA_CLIENT/client
x SAP_HANA_CLIENT/client/ADONET.DEBUG.TGZ
x SAP_HANA_CLIENT/client/ADONET.DEBUG.TGZ.lst
x SAP_HANA_CLIENT/client/ADONET.TGZ
.
.
.
.
x SAP_HANA_CLIENT/licenses/intel_bid.txt
x SAP_HANA_CLIENT/licenses/lz4.txt
x SAP_HANA_CLIENT/licenses/poco.txt
x SAP_HANA_CLIENT/vcruntime140.dll
x SIGNATURE.SMF
SAPCAR: 115 file(s) extracted
Now we connect to SUSE server from the Windows server using
WinSCPand transfer the above extracted files across to windows server.Setup WinSCP to use
SCPtransfers and enter host details (Error in screenshot: Host IP should100.100.100.33i.e IP of the SUSE server and not100.100.100.34, which is the IP of Windows Server)

- Copy the files across to Windows Server

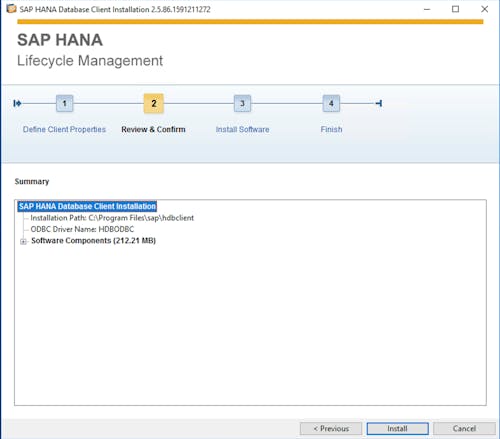
Install 32 bit client
- Install 32 bit version by double clicking the
hdbsetupfile

- Step 1 - Just choose the defaults

- Step 2

- Step 3

- Step 4

Install 64 bit client
- Step 1

- Step 2, rest of the steps are same as for 32 bit version.
Install Process for SAP Business One 10.0 for SAP HANA
Open the required ports for SAP HANA
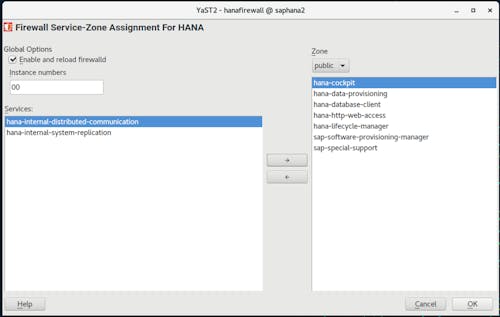
Before any outside client like Windows Server 2016 etc can communicate with SUSE SAP HANA server, you will need to open the required ports. An easy and VERY UNSECURE way that we have seen many people doing is to disable the firewall completely. This is a HUGE security risk and should be avoided. To open just the required ports, we can use the SAP HANA Firewall tool in Security and Users under YaST.
Extract SAP B1
We assume that you have downloaded the required files for SAP B1 from the SAP site as mentioned earlier while you were downloading the files related to SAP HANA.
- Unzip the SAP B1 10.0 archive file -
> cd /hana/data/software/SAP\ 10.0\ PL02

> unzip 51054453.ZIP
Unpack & Install SAP HANA Studio
- Files for SAP HANA Studio are located at
B1 HANA 2.0 SPS05/DATA_UNITS/SAP HANA STUDIO 2.0 FOR B1file location. In this location, we find that there are SAP HANA Studio clients for SUSE, Mac OS and Windows 64 bit(We need this).
 > cd /hana/data/software/B1 HANA 2.0 SPS05/DATA_UNITS/SAP HANA STUDIO 2.0 FOR B1/NT_X64

 > SAPCAR.EXE -vxf IMC_STUDIO2_250_0.SAR

.
.
.
x SAP_HANA_STUDIO/instruntime/warnings.pm
x SAP_HANA_STUDIO/instruntime/FCGI.dll
x SAP_HANA_STUDIO/hdbsetup.exe
x SAP_HANA_STUDIO/vcruntime140.dll
x SIGNATURE.SMF
SAPCAR: 965 file(s) extracted
Using WinSCP, copy this extracted SAP HANA Studio to the windows machine, as shown previously
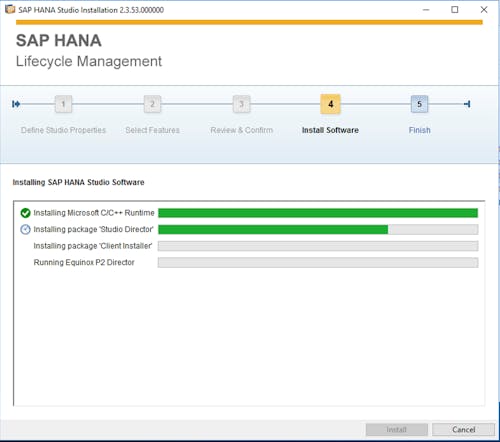
Start the install of SAP HANA Studio by clicking on the
hdbsetupfile and just choose the default valuesStep 1
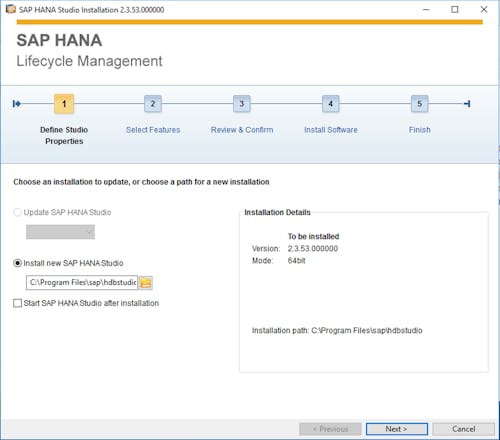
- Step 2
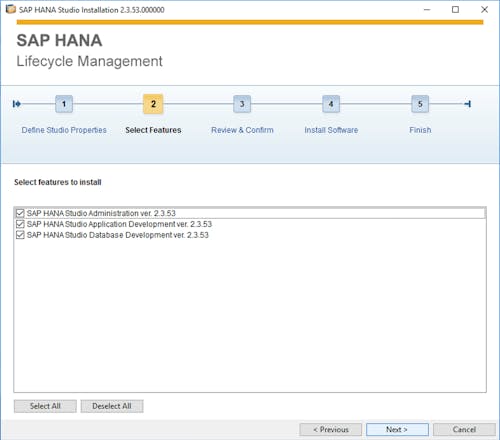
- Step 3
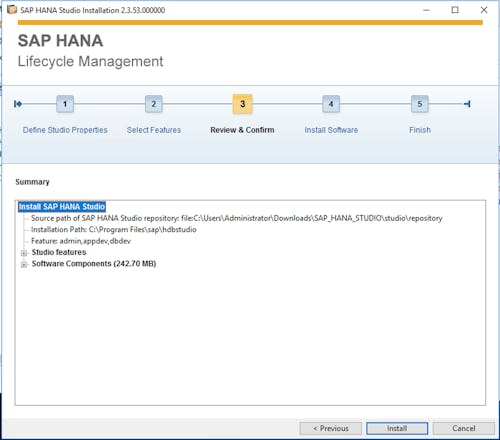
- Step 4
- Step 5
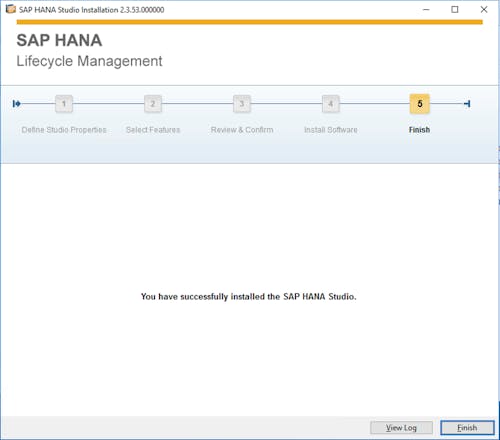
Connect SAP HANA Studio to Tenant Database
Click on the
SAP HANA Studioicon in theStartmenuIf you are asked, choose default recommended directory for
workspaceand pressLaunchYou will be asked if you want to provide password hint, which is a good idea, so follow the prompts to set it up.
Close the Welcome Screen once you have read any important information that is mentioned there.
Create new Host connection. This can be done by clicking on the
Add Serveroption which appears when you click the leftmost icon that is below theSystemstab and enter the following values:- Host Name: saphana2.example.com:30015
- Instance Number: 00
- Mode: Multiple containers -> Tenant Database -> Name: HDB
- Description: saphana2
Connection Properties:
- Select
Authentication by database user - User Name: SYSTEM
- Password: ********
- Select
Create new Superuser to perform Administrative tasks
The User can be created in UI but it is easier to do it via command line.

Right click on the Server name (here HDB@HDB (SYSTEM)) and then select the Open SQL Console option.
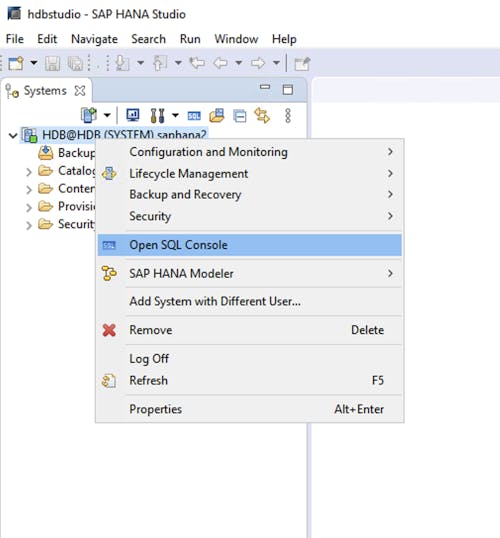
Paste the SQL given below into the SQL Console and press the green Execute button.
--create the user
CREATE USER B1ADMIN PASSWORD UserPassword123;

--grant roles
GRANT CONTENT_ADMIN TO B1ADMIN;
GRANT AFLPM_CREATOR_ERASER_EXECUTE TO B1ADMIN WITH ADMIN OPTION;

--system privileges
GRANT CREATE SCHEMA TO B1ADMIN WITH ADMIN OPTION;
GRANT USER ADMIN TO B1ADMIN WITH ADMIN OPTION;
GRANT ROLE ADMIN TO B1ADMIN WITH ADMIN OPTION;
GRANT CATALOG READ TO B1ADMIN WITH ADMIN OPTION;
GRANT IMPORT TO B1ADMIN;
GRANT EXPORT TO B1ADMIN;
GRANT INIFILE ADMIN TO B1ADMIN;
GRANT LOG ADMIN TO B1ADMIN;

--grant objects
GRANT CREATE ANY, SELECT ON SCHEMA SYSTEM TO B1ADMIN;
GRANT SELECT, EXECUTE, DELETE ON SCHEMA _SYS_REPO TO B1ADMIN WITH GRANT OPTION;
After pasting the code in SQL console

After executing the SQ commands in the SQL console
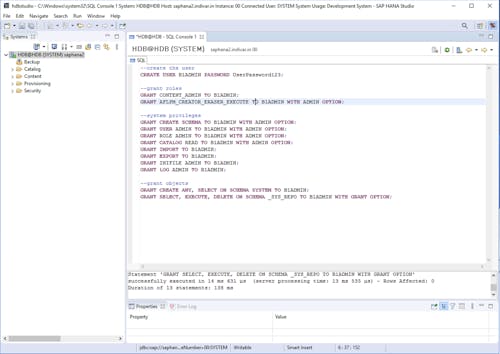
Refresh the Users list and you will see the newly created user

Connect using the new user
Right click on any where on the left side to see the menu and then select Add System

enter the values shown, remember to use port 30015 for the host

Enter the credentials of the newly created user B1ADMIN.
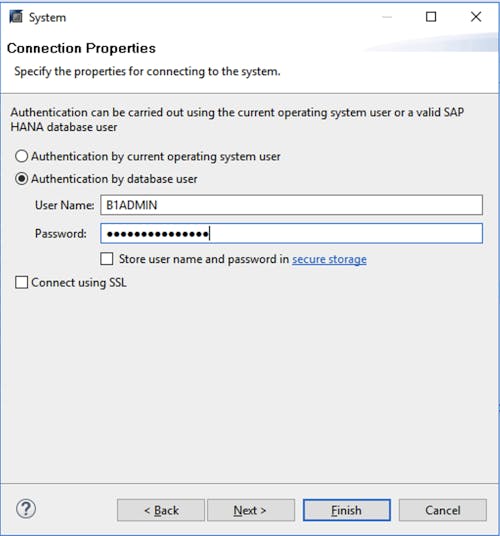
After that you will be asked to change the password

You can then see the newly added system with user B1ADMIN

Installing SAP B1 Server
This install will have to be done on the linux machine and as it requires a UI, you can use the Proxmox Console or RDP to install it
cd /hana/data/software/SAP 10.0 PL02/Packages.Linux/ServerComponents
> install
- Press
Nextto proceed

- Keep the default values and press
Nextto proceed

- Keep the default values
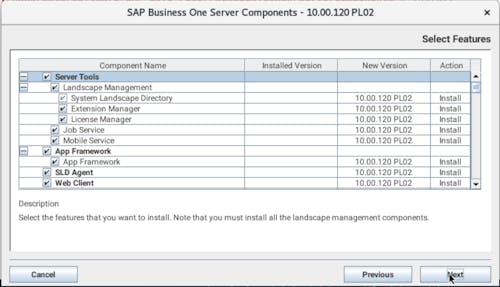
But also scroll down and choose a demo database to install that is relevant to your country (in our case India) and press Next to proceed

Choose whether you want to use IP Address or Hostname to identify your server. Here we are showing Hostname, but using IP Address is a better option sometimes.

- Keep the default values and press
Nextto proceed
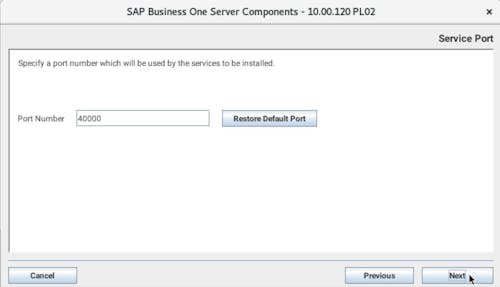
- Keep the default values and press
Nextto proceed

- Enter secure password and press
Nextto proceed
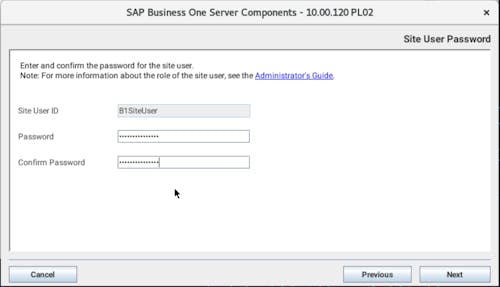
- Keep the default values and press
Nextto proceed

- Keep the default values and press
Nextto proceed. If you had chosen IP Address as an option previously then you will see the IP Address here instead of the hostname

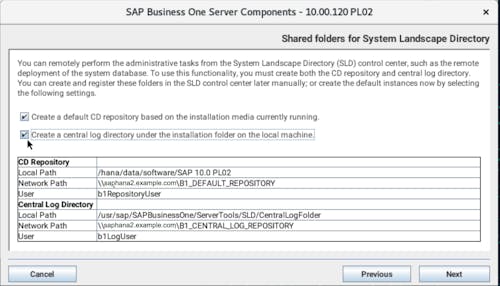
- Click on both the check boxes to allow the install process to create the Repo and Log directory. These can be generated later also but its easier to fo it as part of the install process. Press
Nextto proceed
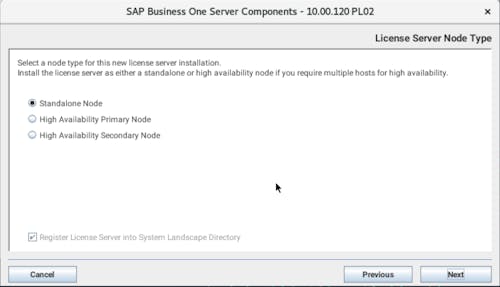
- Keep the default value of
Standalone Nodeand pressNextto proceed
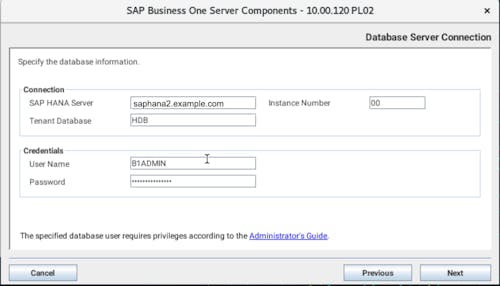
- Enter the following values:
- SAP HANA Server: IP Address or hostname that you provided earlier, should already be prepopulated
- Instance Number:
00 - Tenant Database:
HDB - User Name:
B1ADMIN - Password: Password that you set for the B1ADMIN user
Important: Make sure that your /etc/hosts is setup properly. It should have an entry for your IP Address and hostname. As shown below
#
# hosts         This file describes a number of hostname-to-address
#               mappings for the TCP/IP subsystem.  It is mostly
#               used at boot time, when no name servers are running.
#               On small systems, this file can be used instead of a
#               "named" name server.
# Syntax:
#
# IP-Address  Full-Qualified-Hostname  Short-Hostname
#

127.0.0.1       localhost
100.100.100.33  saphana2 saphana2.example.com

# special IPv6 addresses
::1             localhost ipv6-localhost ipv6-loopback

fe00::0         ipv6-localnet

ff00::0         ipv6-mcastprefix
ff02::1         ipv6-allnodes
ff02::2         ipv6-allrouters
ff02::3         ipv6-allhosts
Otherwise you will get an SAP HANA 1.0 port range is detected. Failed to connect, check the network address error, as shown below

or this error

- Keep the default values and press
Nextto proceed

- Keep the default values and press
Nextto proceed
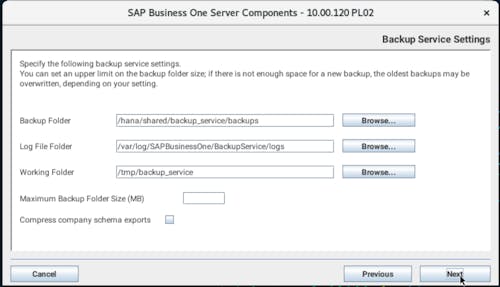
- Keep the default values and press
Nextto proceed
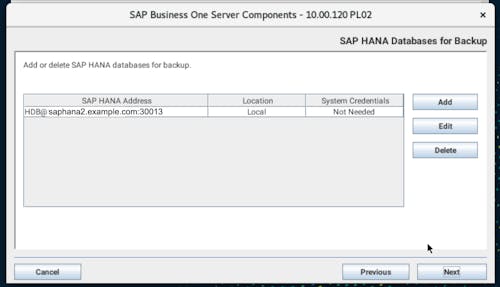
- Select
Automatic RestartpressNextto proceed

- Keep the default values and press
Nextto proceed

- Keep the default values and press
Nextto proceed
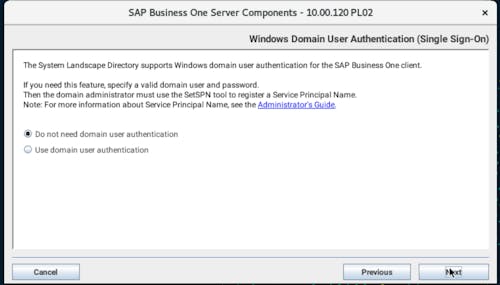
- Keep the default values and press
Nextto proceed

- Keep the default values and press
Nextto proceed
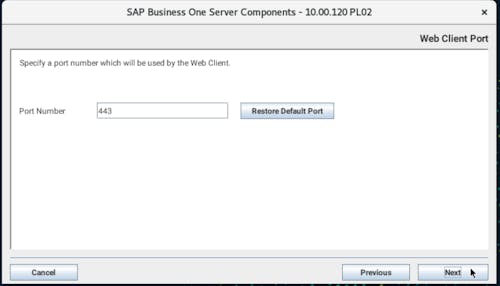
- Keep the default values and press
Nextto proceed

- Keep the default values and press
Nextto proceed
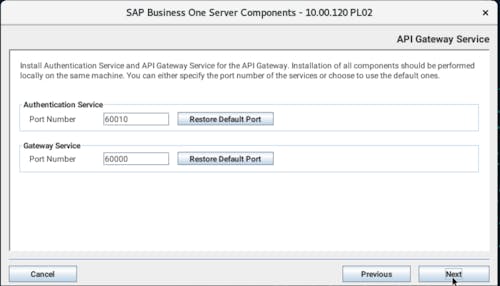
- Press
Nextto finish
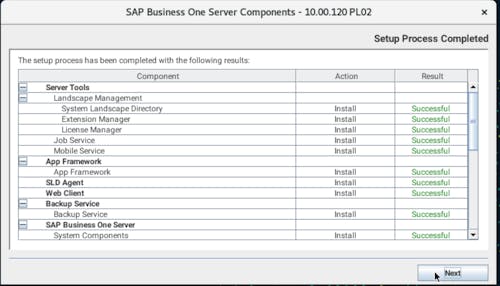
Install SAP B1 Windows Client
This the last step for the full install process. Using WinSCP copy the Prerequisites and Packages.x64 directories from /hana/data/software/SAP 10.0 PL02 directory to your Windows servers. In our case, we copied these directories to Downloads\SAP-B1 directory on Windows
Using RDP run the setup.exe file in the Downloads\SAP B1\Packages.x64\Client to start the install process
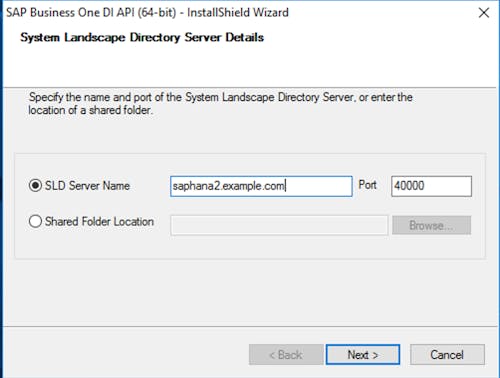
You will have to enter SLD at one step, so just use the IP Address or the hostname that you defined in the previous step.
Just follow the prompts and defaults for most of the screens and the software will be setup.
- Indivar Software Solutions Pvt Limited, India and New Zealand: Co-Founder and CTO
- Credence Medicure Corporation: Co-Founder & Director - IT
- Stakteck Limited: Co-Founder and CTO


